


Angular Meets AI & Supabase: A Beginner's Guide
Explore a comprehensive guide to seamlessly integrate AI capabilities into Angular projects. Boost efficiency and discover the best practices for creating powerful AI tools with Angular.


If you're starting a new project with AI and Angular, this combination works best!
Ignore the solutions you find online that might share your ChatGPT private key or have other security issues.
Here's a simple and affordable formula: Go for an Angular project with Supabase!
With this setup, you have the flexibility to create a variety of AI-powered Angular applications tailored to your needs, such as sentiment analysis tools, text classification tools, AI code generation, and more.
Why Supabase?
It's straightforward and cost-effective. You can effortlessly run a Supabase instance (using Docker) on your computer, and you can even have it for free ????.
But what sets Supabase apart, and why I opted for it, is the ability to have scalable functions to execute your code without the hassle of server management.
"Edge Functions are server-side Typescript functions, distributed globally at the edge - close to your users. They can be used for listening to webhooks or integrating your Supabase project with third parties." – supabase.com
I picked Supabase because of its simple authorization feature, which makes things more secure.
While other tools like Cloudflare and Vercel may have similar features, I found Supabase to be easier for ensuring that only the right people can safely use our edge functions.
This approach alleviates concerns about "unnecessary" HTTP requests, potentially saving a significant amount of money, especially when dealing with requests to ChatGPT ????. While similar capabilities exist in other tools, I find Supabase easier to work with.
One drawback to note is that Supabase Client doesn't support tree shaking, meaning the entire Supabase source code, including functions like Realtime and Storage, ends up in your bundle, even if you don't need them.
Another compelling reason for choosing Supabase is its support for AI & Vectors, although I won't delve into that aspect right now.
Now that I have your attention, let's explore a simple example of getting started with Angular and AI.
Setting up Supabase for AI in Angular
For your initial AI response, before initiating a new Angular project, let's set up our first edge function to receive a simple response from ChatGPT.
Ensure you have the following prerequisites:
- Docker installed (required for running Supabase locally).
- Supabase CLI (to simplify our workflow).
- PNPM (I opt for this, but feel free to use NPM, YARN, or your preferred package manager).
Installing Prerequisites
Now, create a new folder, open it in the terminal, and execute:
pnpm init //This will create a new package.json file
pnpm install supabase // This will install supabase cli
pnpm supabase init // This will init a new supabase project
pnpm supabase start // This will start a supabase stack using Docker
During the initial run, the pnpm supabase start command will take some time to download and set up everything it requires. Please be patient.
Upon completion, you should see something similar to this: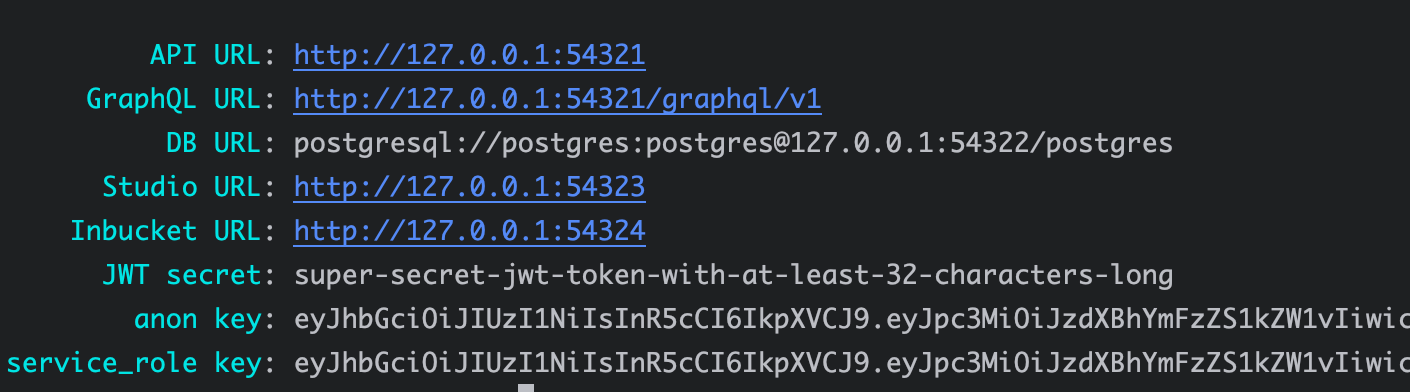
No need to worry, this is exactly what you need! We're almost there. ????
Creating the Supabase AI Edge Function
Now, let's proceed to create our new edge function. In the same folder, run the following command in the terminal:
pnpm supabase functions new open-aiAs mentioned earlier, the Supabase client simplifies our workflow. After executing this command, you should observe a new folder within the supabase > functions directory, named open-ai – this is your edge function.
It should resemble something like this, although it may vary depending on when you try it (assuming the Supabase team hasn't altered the default template ????).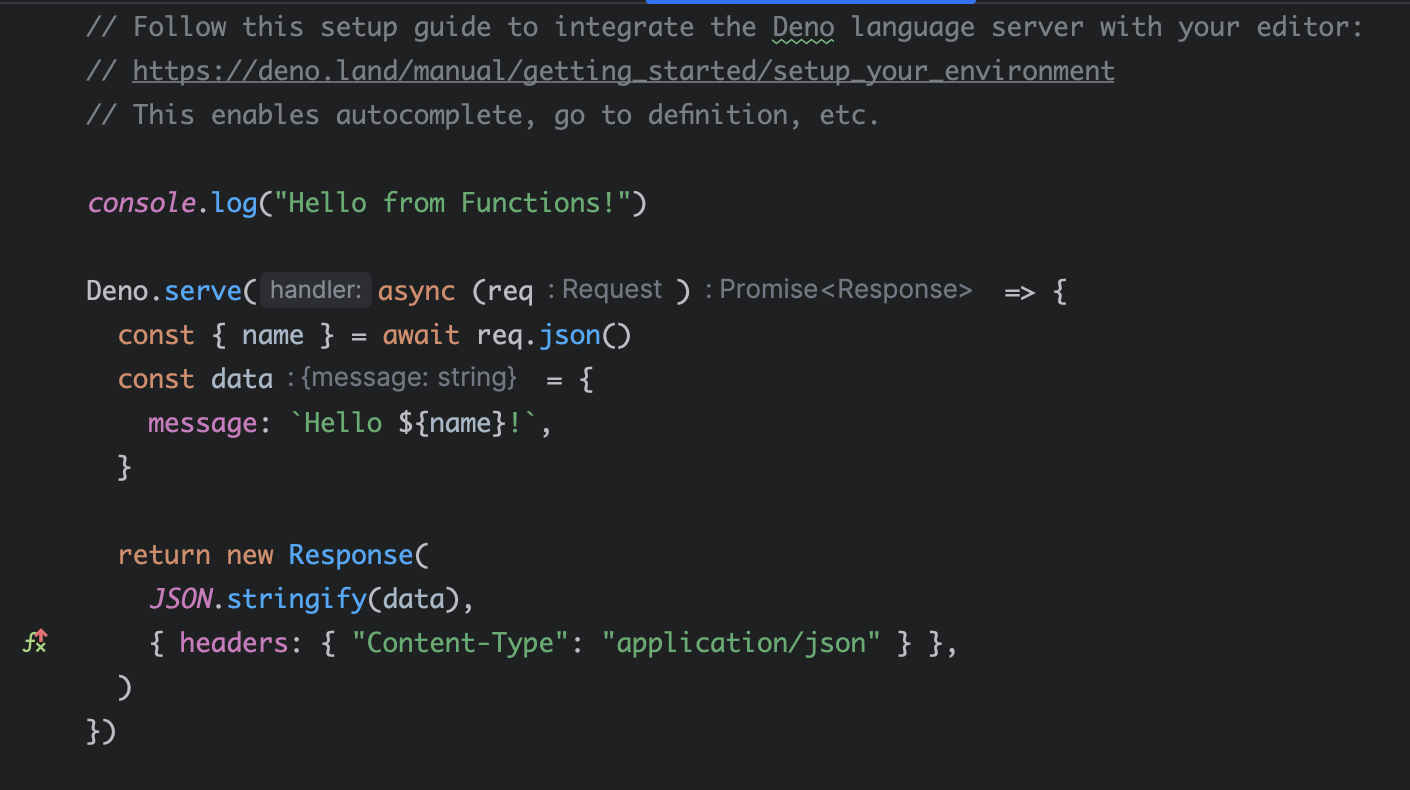
As evident, Deno is the chosen runtime. Ensure that you set up the environment correctly.
The default function template includes instructions on how to invoke it locally: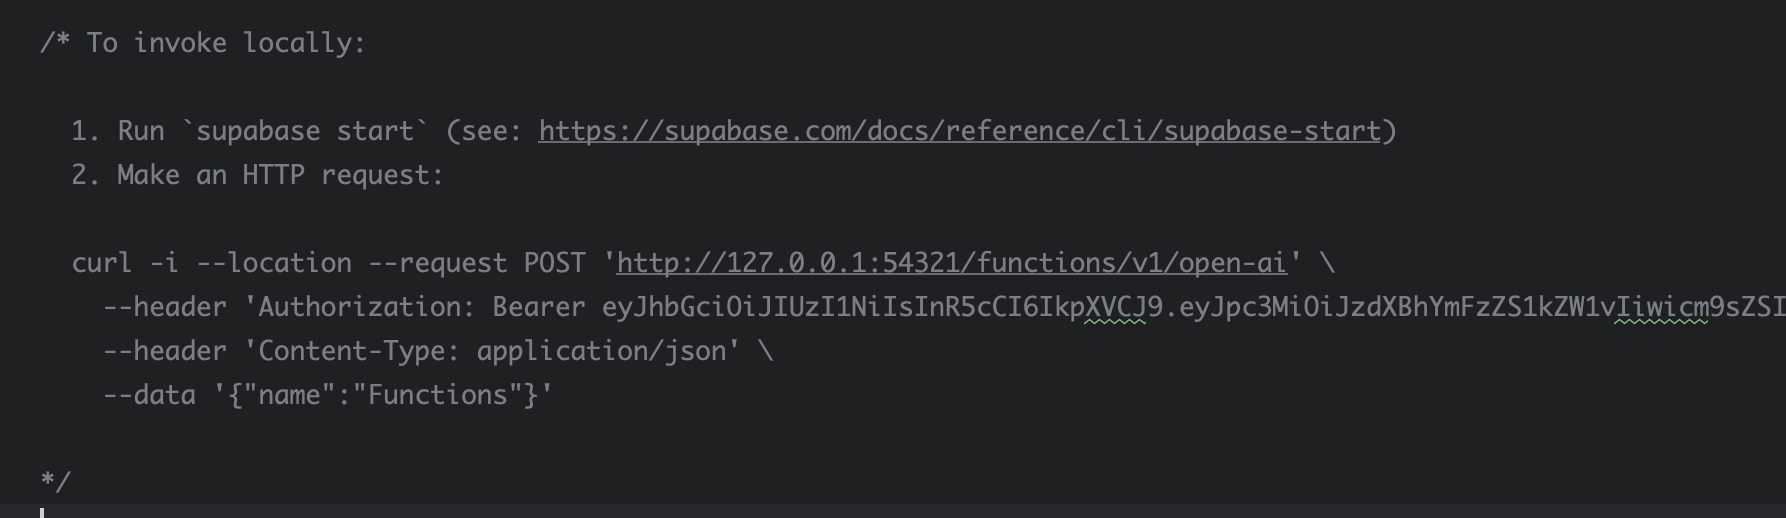
Keep the provided instructions; we'll use them later!
For a quicker process, copy and paste the following code into the function:
import 'https://deno.land/x/[email protected]/mod.ts'
import { CreateCompletionRequest } from 'https://esm.sh/[email protected]'

Deno.serve(async (req) => {
  const { query } = await req.json()

  const completionConfig: CreateCompletionRequest = {
    model: 'gpt-3.5-turbo-instruct',
    prompt: query,
    max_tokens: 256,
    temperature: 0,
    stream: false,
  }

  return fetch('https://api.openai.com/v1/completions', {
    method: 'POST',
    headers: {
      Authorization: `Bearer ${Deno.env.get('OPENAI_API_KEY')}`,
      'Content-Type': 'application/json',
    },
    body: JSON.stringify(completionConfig),
  })
})
In the code, you'll notice Deno.env.get('OPENAI_API_KEY'); this represents the OpenAI API key, which we need to obtain from the OpenAI platform.
Now, let's generate a new API token: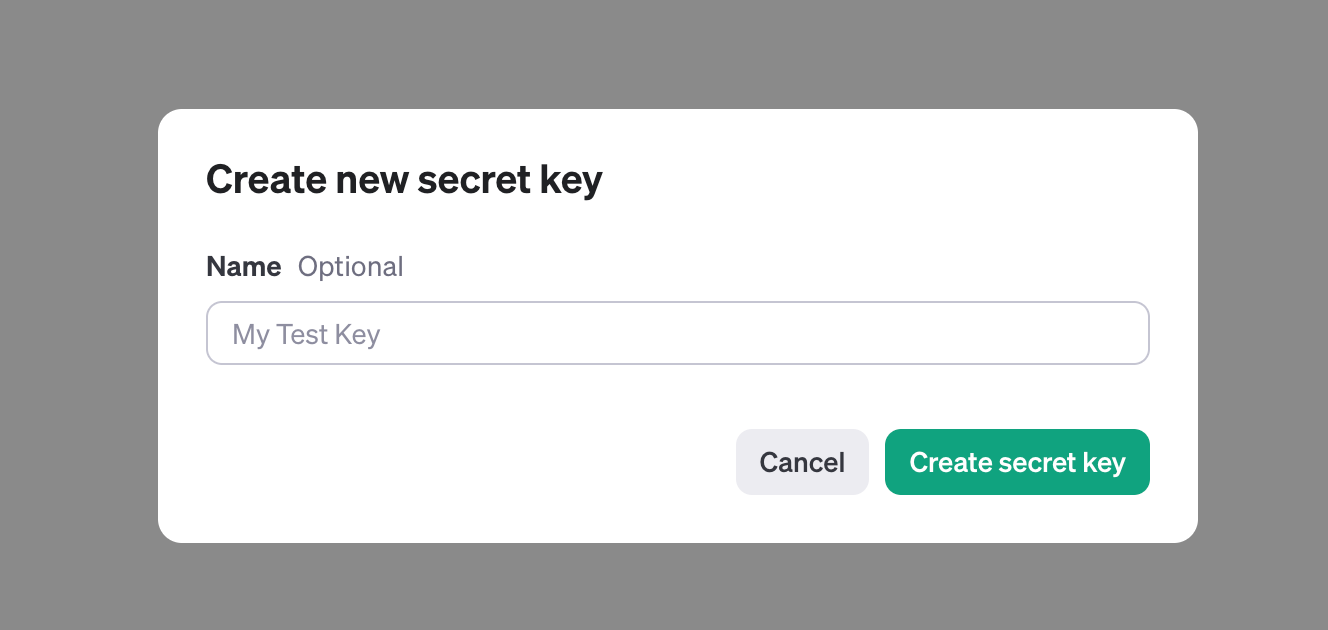
Give it any name you prefer and make sure to copy it!
Navigate to the project files and create a new .env file, like this:
mkdir .env.localOpen the file and insert your recently generated secret key:
OPENAI_API_KEY=your_secret_keyRunning the Function Locally
Now, for the exciting part – let's run it:
pnpm supabase functions serve --env-file .env.local --no-verify-jwt For those new to Supabase, a couple of points to highlight:
--env-fileis utilized to configure the correct environments for the edge function.--no-verify-jwtis employed to access this function externally.
Recall the instructions provided earlier for testing the function locally. Let's use them now.
Open a new terminal and execute:
curl -i --location --request POST 'http://127.0.0.1:54321/functions/v1/open-ai' \
    --header 'Authorization: Bearer ...' \
    --header 'Content-Type: application/json' \
    --data '{"query":"Can you help me?"}'
However, instead of using --data '{"name":"Functions"}', we'll use --data '{"query":"Can you help me?"}'.
If you see something like this, then you've done everything correctly!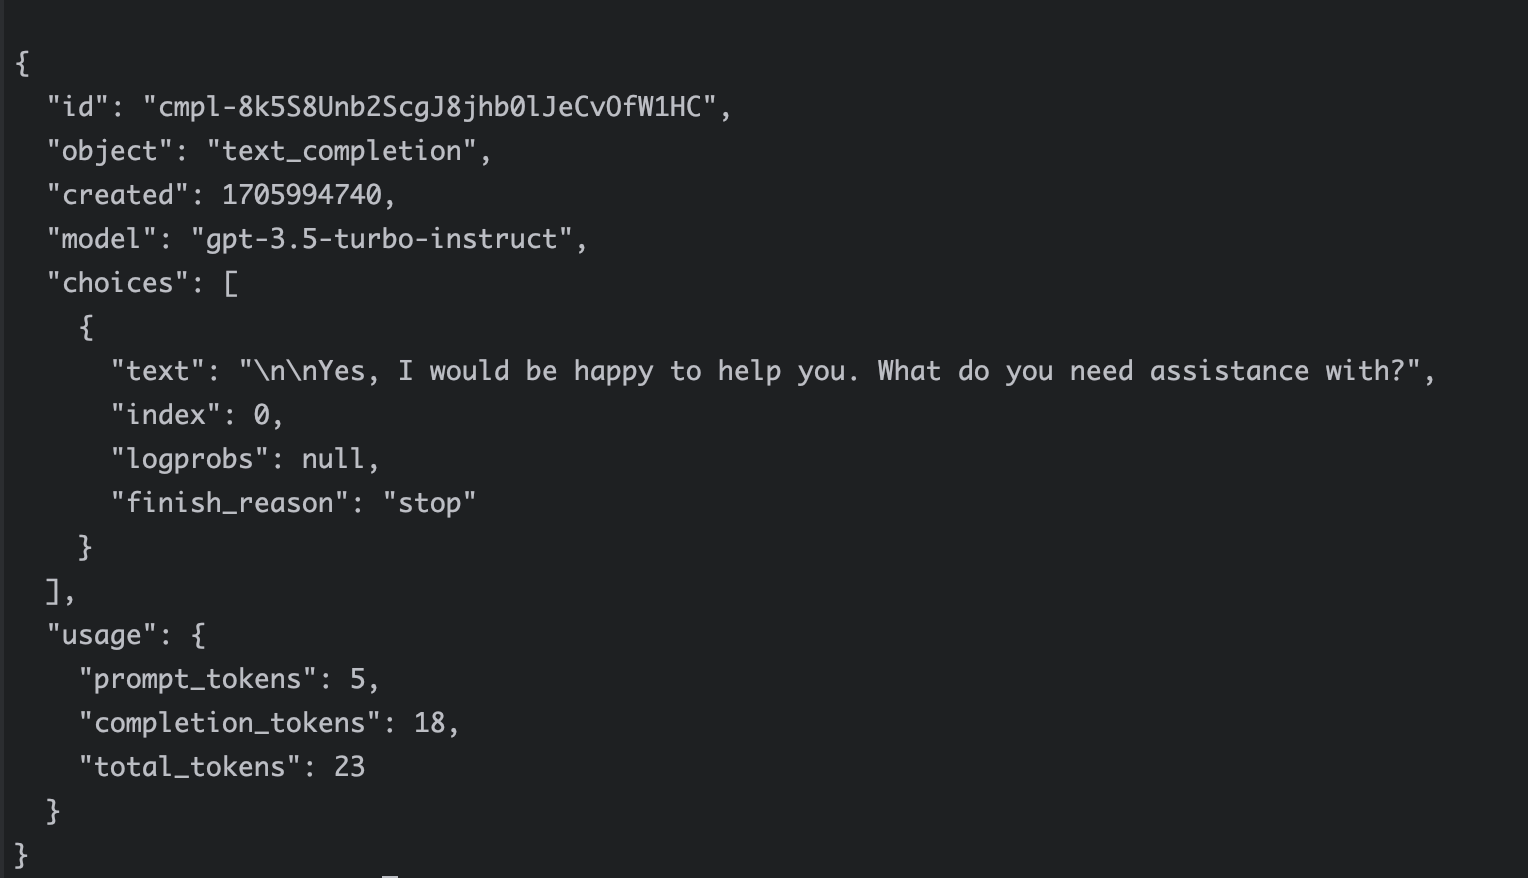
If not, feel free to leave a comment, and I'll assist you.
Congratulations! You've successfully created your first AI function!
Angular Setup
Assuming you're already familiar with Angular and how to create a new project, I won't delve into many details here to keep this blog post concise. Follow the guide to set up a new workspace in Angular.
Installing Supabase Client
Now, let's proceed and install the Supabase client:
pnpm install @supabase/supabase-jsWe won't adhere strictly to best practices for incorporating Supabase into an Angular project. I'll demonstrate a straightforward way to get started and make a call to the edge function.
Incorporating Supabase into Angular
Open the component where you intend to use the edge function and import the Supabase client.
import {createClient} from '@supabase/supabase-js';

const client = createClient(SUPABASE_URL, SUPABASE_KEY);
Where SUPABASE_URL and SUPABASE_KEY represent the following variables: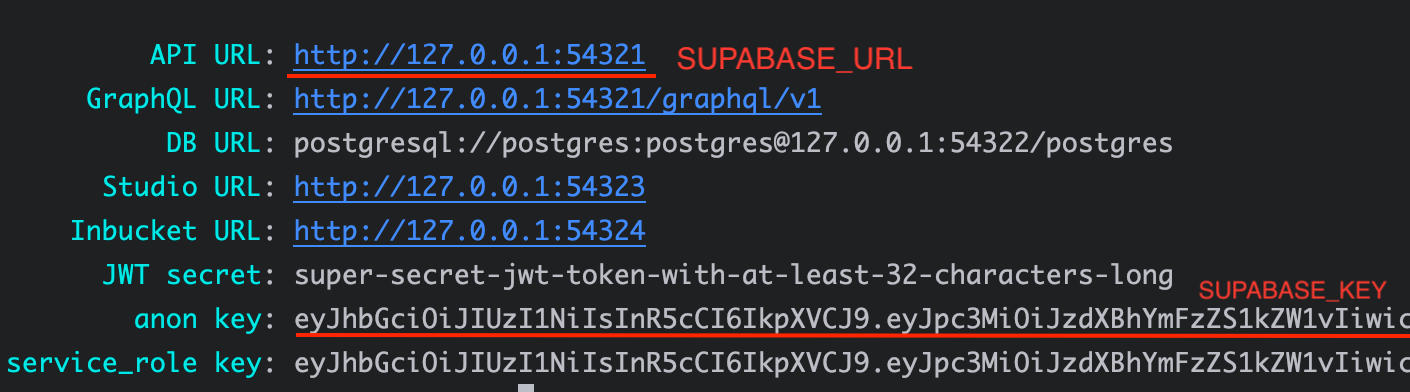
Invoking the AI Function in Angular
Great, now that we have the Supabase client ready to invoke our AI function, let's add a new method and call it:
import {createClient} from '@supabase/supabase-js';
const client = createClient(SUPABASE_URL, SUPABASE_KEY);
@Component({
...,
template: ''
})
export class MyComponent {
async invokeAiFn() {
const data = await client.invoke('open-ai', { query: 'Can you help me?' })
console.log(data)
}
}That's it! I'll leave it to you to let me know the output of invokeAiFn() in the comments below.
Wrapping Up
While this setup is fairly straightforward, you might encounter some challenges in steps like running the Supabase stack locally and connecting it to Angular.
However, it's a manageable process, and following the guidelines provided in this article should help.
While I believe this is a solid approach to creating an AI tool with Angular, there could be other best practices that I'm not yet aware of. Feel free to share any alternative options if you know of them.
Additionally, using Astro with Qwik or Solidjs could be a good choice, but that's a topic for another discussion.
Thank you, and I look forward to seeing you in the next article.